
Material Editor
The material editor allows you to change the material properties used to render your models, which can drastically change the way they look in the final render. There are two ways to access it:
Method #1
- Open the "Model Catalog" and find the model of which you want to edit a material.
- Right-click the icon.
- If you see "Import asset" in the list, click that option. This means it's an external asset, which needs to be converted to Pragma first.
- If you see "Load" in the list, click that option. This means the asset hasn't been loaded yet.
- Right-click the icon again and select "Edit Material" from the list.
- Select the material you wish to edit.
Method #2
- Open the "Material Catalog" and find the material you wish to edit.
- Right-click the icon.
- If you see "Import asset" in the list, click that option. This means it's an external asset, which needs to be converted to Pragma first.
- If you see "Load" in the list, click that option. This means the asset hasn't been loaded yet.
- Right-click the icon again and select "Edit Material" from the list.
Both methods will open the material editor, the only difference being that with method #2 you will get a sphere in the material editor preview viewport instead of an actual model. In most cases you should prefer method #1.
You should be seeing a window like this:
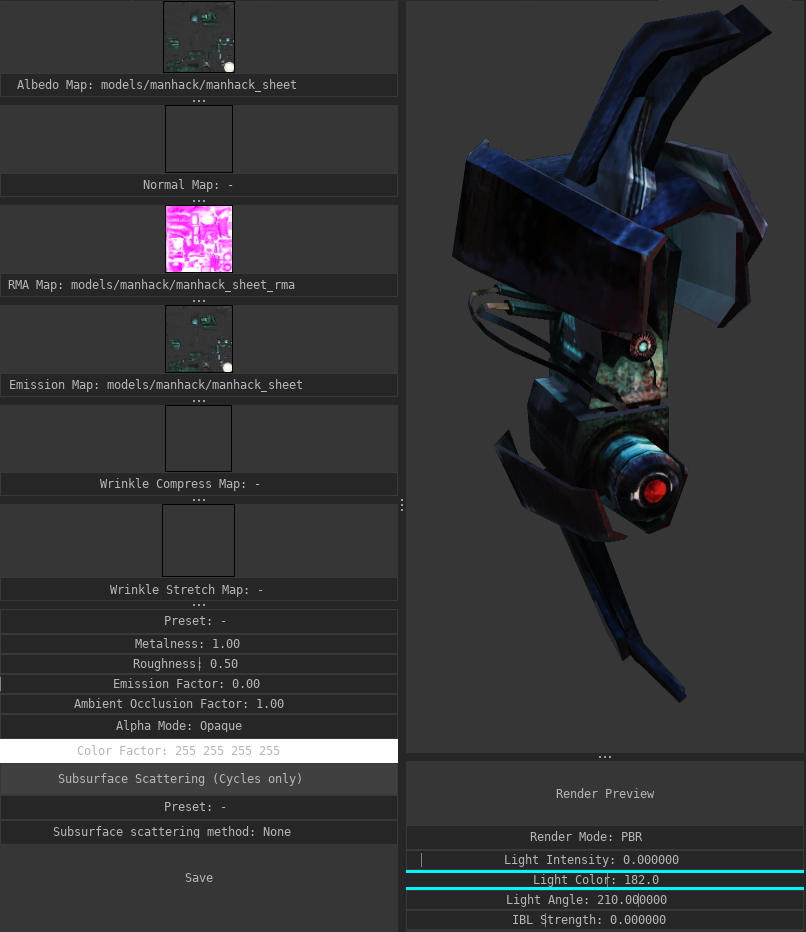
The left column contains all of the available material properties, the right column contains a live preview. Any changes to the material properties will immediately update the preview window.
The options below the preview viewport have no effect on the material itself.
Textures
For each material there are multiple texture slots available: Albedo Map, Normal Map, RMA Map, etc. Pragma (and Cycles) uses a standardized PBR model with the metallic workflow.
If you want to change the texture for one of the slots, all you have to do is open the file path in the system explorer and simply drag-and-drop the image file into the respective slot (make sure Pragma is running in windowed mode!).

To clear a texture slot, simply right-click on it and choose "Clear".
Some textures are affected by the material properties.
WheneverFor instance, if you makeassign anyan changesemission totexture, anyit ofwill not actually have an effect, unless the material"Emission properties
Thereproperty areis two> ways to open the material editor: Through the material catalog, or the model catalog.
In general, you should always go through the model catalog if possible, since that'll give you the preview for the actual model.
0.
RMA Map
A RMA-map is a special texture that holds PBR components in the rgb-channels:
- Red: Ambient Occlusion
If you don't have PBR-textures, you can clear the texture slot and control the PBR-properties with the sliders instead.
If you don't have a RMA-map, but you have the PBR-textures as separate image files, you can easily combine them to a RMA-map with the material editor. To do so, follow these steps:
- Right-click on the RMA texture slot
- If you don't have an ambient occlusion map, and you've opened the material editor with method #1, you can also right-click on the ambient occlusion map slot and click "Generate ambient occlusion", which will automatically generate an ambient occlusion map for the model.
Material Properties
PBR
RMA
Roughness/Metalness/Specular/glossiness
Transparency
Subsurface Scattering