
Binary Modules
Binary modules allow you to change or extend the behavior of Pragma without having to change the core source code. Binary modules are written in C++ and loaded during runtime using Lua (with some special exceptions). Some example modules are:
- pr_chromium: Adds an integrated Chromium-based Web Browser to Pragma
- pr_openvr: Adds virtual reality support to Pragma
- pr_bullet: Adds support for the Bullet physics engine to Pragma
- pr_physx: Adds support for the PhysX physics engine to Pragma
- pr_curl: Adds support for the curl library to Pragma
- pr_sqlite: Adds SQLite support to Pragma
Installing Modules
If the binary module is available on GitHub and has at least one release, you can use the following console command in Pragma to install the module directly:
install_module <GitHubUser>/<RepoName>For instance, if you want to install the pr_curl module, simply run install_module Silverlan/pr_curl in the console, which will automatically download the module and install it.
Alternatively, if a binary module comes with prebuilt binaries, you can simply extract the archive to your Pragma installation directory, the file structure in the archive should ensure that its placed in the correct location. Simple modules that consist of a single library file can usually be found in the "modules" directory, while more complex modules (like chromium) reside in their own sub-directory within "modules".
The module can then be loaded with a simple Lua-script:
local moduleName = "chromium/pr_chromium"
local result = engine.load_library(moduleName)
if(result ~= true) then
    console.print_warning("Failed to load \"" .. moduleName .. "\" module: " .. result)
    return
end
The module name is the path to the binary file, without the "modules/" prefix and without the file extension. On Linux the module file also has the "lib" prefix, which has to be omitted as well. For instance, if the module filename is "modules/curl/libpr_curl.so", then the module name should be "curl/pr_curl".
Building Modules
If you want to build a module manually, you'll have to first build Pragma. You can then add the module to the build instructions by using one of the following methods:
Method 1) (Recommended)
Open pragma/build_scripts/user_modules.py in a text-editor and follow the instructions to add your module.
After that, simply re-run the build script.
Tip: You can use the --rerun option to make the build script re-use the options used in the previous build.
Method 2)
You can also add the following option when running the build script:
--module <name>:<gitUrl>
For instance, if you want to add the pr_chromium module to the build:
--module pr_chromium:https://github.com/Silverlan/pr_chromium(You can use the --module argument multiple times if you want to add more than one module.)
Once the module has been added to the build, you can simply build the pragma-install target. It will build the module and install it automatically. You should then be able to find the module within the "modules" directory of the pragma installation folder.
Custom Modules
Setting up your own custom module is very simple and only takes a few minutes using the Pragma module template repository on GitHub, which also includes workflows for automated builds and releases.
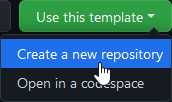
To do so, go to the template repository and create a new repository from it:
You can choose whatever name you want for the repository, but for consistency it is recommended that it should have the same name as the module, which means:
- It should start with the "pr_" prefix
- It should be all lowercase
- It should only contain letters and underscores
Some examples are: "pr_chromium", "pr_bullet", "pr_audio_fmod", etc.
Next click "Create repository from template" to generate the repository.
The generated repository now contains a bunch of template files, which still need to be initialized. To do so, open the file "template_pragma_module.json" on GitHub and edit the values within:
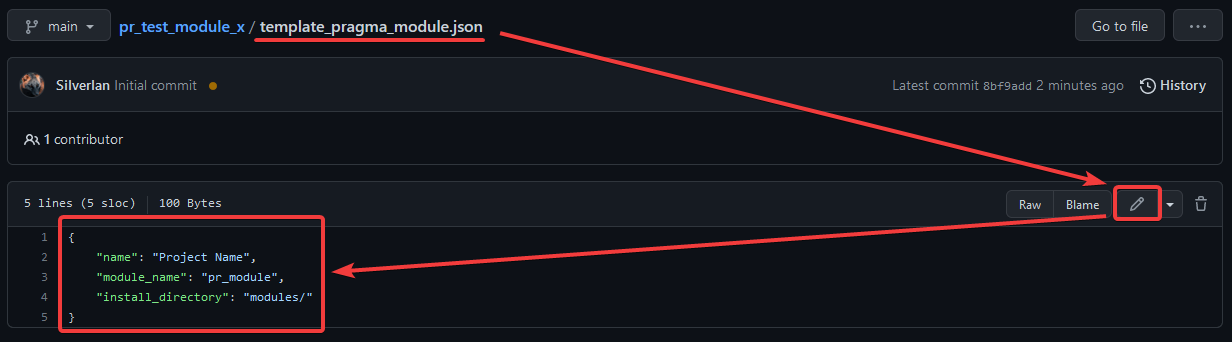
- name: A pretty name, which will appear in the generated readme.
- module_name: The internal name of the module (i.e. the name of the CMake target and the binaries). This name should always start with the prefix
pr_and always be lowercase. It should match the repository name if possible. - install_directory: The directory where the module should be installed to, relative to the Pragma installation. Please choose this value carefully:
- If you know your module is going to be a single binary with no additional files, it's recommended to leave this value at the default ("modules/").
- If your module requires additional files, it's recommended to change this value to a sub-directory, e.g. "modules/<moduleName>/".
- If your module requires Lua-scripts or asset files, it's recommended to change this value to an addon path, e.g. "addons/<addonName>/modules/<moduleName>/".
- release_directory: The directory that will be used for the GitHub releases. This value usually depends on the install_directory:
- If the install_directory is the default ("modules/"), leave this value empty. In this case only the binary file will be added to the GitHub release.
- If the install_directory is a sub-directory in "modules/", set this value to the same sub-directory (i.e. the same value as install_directory).
- If the install_directory points to an addon, set this value to the addon path (e.g. "addons/<addonName>/").
Example:
{
    "name": "Chromium",
    "module_name": "pr_chromium",
    "install_directory": "addons/chromium_browser/modules/chromium/",
    "release_directory": "addons/chromium_browser/"
}
When the module has been built, the binary will be located in "pragma/addons/chromium_browser/modules/chromium/pr_chromium.dll" (or "libpr_chromium.so" for Linux).
The GitHub release will contain all files that are within "pragma/addons/chromium_browser/". Users will be able to simply extract the release over their Pragma installation to install the module.
Once you have edited the values in the json-file, commit your changes. This will trigger a workflow which will initialize the repository with your values, which should take about two minutes. Simply refresh the page a few times, once you can see the following icons at the top of the readme, it means the initialization was completed:

The initialization will also trigger the automated build workflows, which may take a few hours to run. Once they have completed, the two icons should turn green, and you should find the compiled binary files available for download for both Windows and Linux in the "Releases" section of the repository.
The build workflows will automatically trigger whenever you push any new commits to the repository and the release binaries will be updated every time. If there are any errors during the build process, the icons will say "failing" again, and you can check the workflow log for more information on what caused the failure.
Once you've set up the repository, you can follow the instructions in the section about building modules to add the module to the pragma build.
Stable Releases
If your module has reached a state that can be considered "stable", you can publish a stable release. To do so, wait for the regular build workflows to complete, then go to the "Actions" tab of your repository and select the "Create Stable Release" workflow, enter a version number and click "Run workflow":
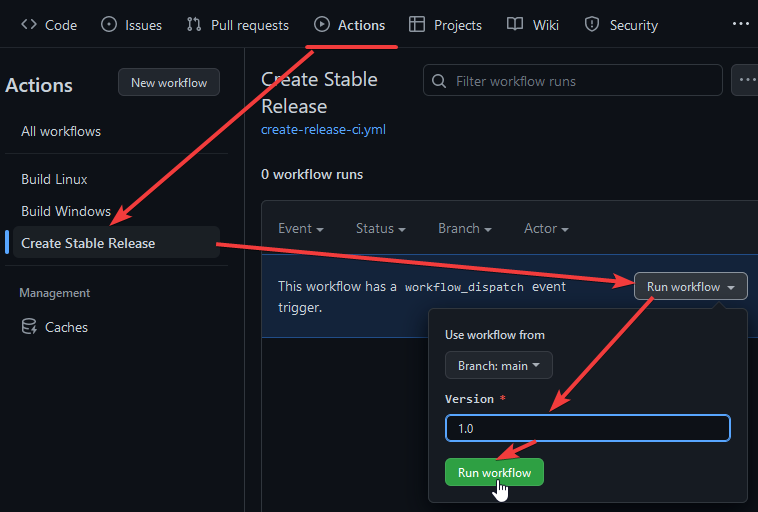
This workflow should only take a minute, as it just publishes the latest binaries as a new release.
Testing
You can find a simple test Lua-script in the "examples" directory of your module. Follow the instructions in the commented section of the script to install and run it to test the module.
Advanced Building
If your module requires additional steps (such as downloading and building external dependencies) before it can be built, you can add those steps to the python script in "build_scripts/setup.py". This script will be executed automatically whenever the Pragma build script is run.
Advanced Installation
By default the module binary file will be installed to the "modules" directory of the Pragma installation. If you want to change this behavior, you can do so by editing the "CMakeInstall.txt" file.
No comments to display
No comments to display