
Rendering Animations
This workflow assumes that you have already set up a project ready for rendering, and that you have read the article about the rendering window.
For rendering animations, it is recommended that you use the Pragma renderer. Using a raytracing renderer like Cycles X is possible, but even with top-of-the-line hardware it can take days, weeks or even months to render a full animation. Additionally, some rendering effects (like Motion Blur) are currently only supported for the Pragma renderer.
This workflow assumes that you're going to use the Pragma renderer, and describes the recommended steps.
Reflection Probe
A reflection probe contains a cubemap image of the scene, which contains lighting information used by reflective objects. Without a reflection probe, reflective objects will look unnatural. You can create a new reflection probe via the actor editor:
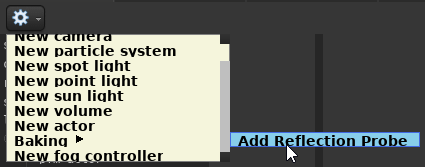
In most cases one reflection probe will suffice. During rendering, whichever probe is closest to the camera will be used, and all others will be ignored.
Placement
Reflection probes are not visible in the viewport, but you can see its location by selecting it in the actor editor, and entering move mode by pressing the  button:

Simply move the probe somewhere close to the camera and near the center of your scene. Make sure the probe is not obstructed by any objects or close to any walls and that most of your scene is visible from the reflection probe's position. The rotation of the probe does not matter. Once your probe is in place, you're ready to bake:
Baking
To bake a reflection probe select the reflection_probe component from the component list, and press the Bake reflection probe button:
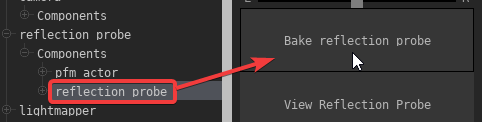
The baking process may take a minute or more, make sure not to deselect the component while this is happening or the process will be cancelled.
Once baking is complete, a window like this should pop up:
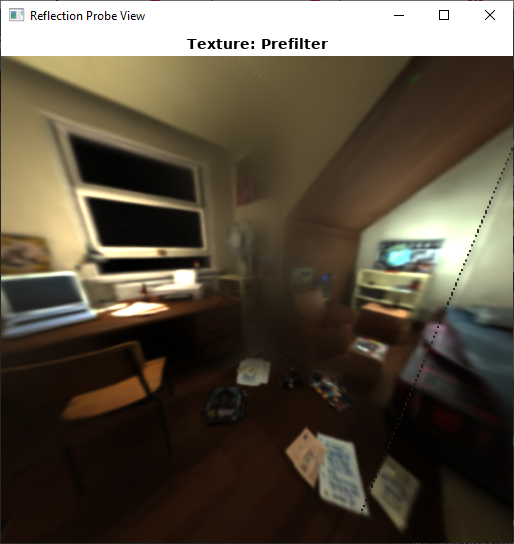
All of the static actors in your scene should be visible. You can now close this window and save the project. The effect may not be immediately noticeable, but it can subtly improve reflective surfaces a fair amount.
The reflection probe will have to be rebuild if you move any of the static actors or add any new static actors to the scene. For this reason it's best to do it right before you're about to do the final render of your scene.
Example
Here is an example video on how to set up a reflection probe:
Lightmaps
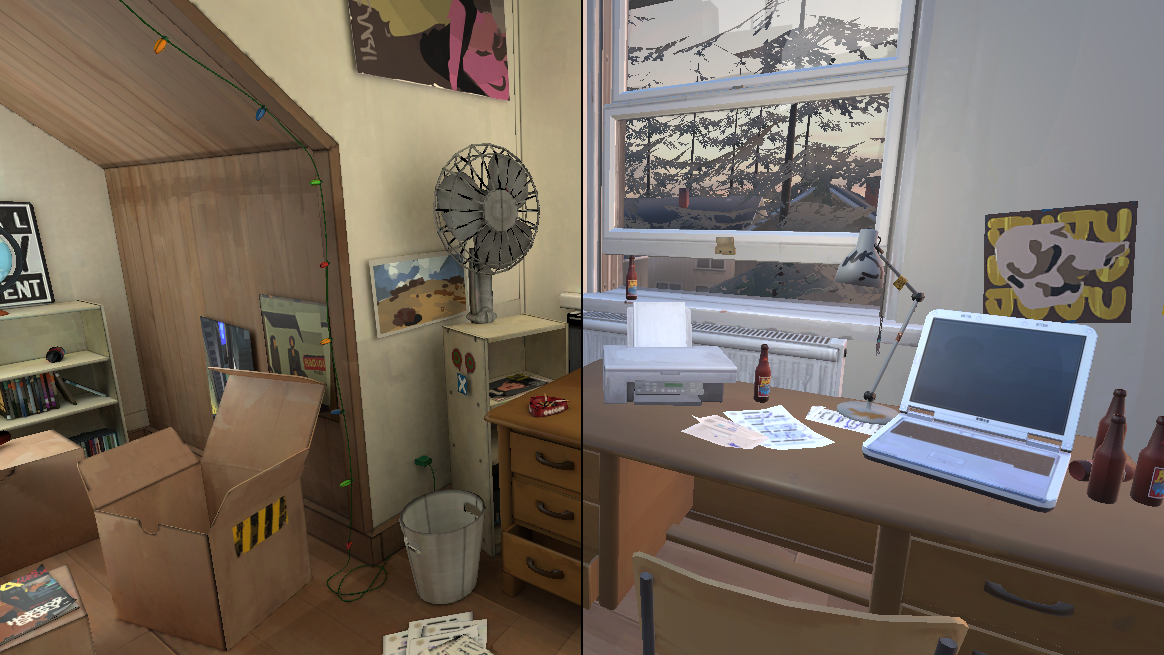
(Left = With Lightmaps, Right = Without Lightmaps)
Lightmap baking is a way of calculating lighting information for your scene in a pre-processing step, which can significantly improve the rendering quality of your scene. If you don't have any static actors (i.e. non-animated) props in your scene, this will not matter, but if you do, lightmaps become very important. There is a bit of setup required, however, and rendering the lightmaps can take several hours, depending on your GPU. On the flip side, it's still significantly faster for animations than rendering with raytracing and the lightmaps only have to be baked once.
Setup
Map
Lightmap baking only works with scene builds. If you're using a map that isn't completely empty (i.e. has visible geometry), you will have to convert it to a scene build first. To do so, simply select Tools > Convert Map to Actors from the menu bar. This will convert the map and its props to actors in your project. Please note that since the map is now part of the project itself, you should not load the map anymore the next time you want to use the project. Instead, load an empty map instead.
If your project is a pure scene build and does not use a map as a base, you can skip this step.
Static Actors
First of all you have to specify which actors should be included in the baked lightmaps. This should be all static props (and only the static props) in your scene. To do so, simply add the light_map_receiver component to those actors:
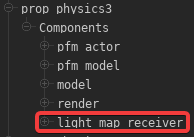
Depending on how the actor was created, the component may already be there and you can skip this step entirely. If the component doesn't exist, you can add it manually. Only actors with this component will considered. Do not add this component to any actors that move around in the scene or that are otherwise visibly animated (e.g. with skeletal or facial animations).
Light Sources
Next up, you will have to place some point light sources in your scene. Place as many as you like, but do not animate them in any way. These lights will be baked using the Cycles renderer, you can can render a preview image of your scene in the Render window to get an idea of what it will look like after the baking process. These light sources will only be used for the baking process and will only affect static actors with the light_map_receiver component once it's all done.
Do not check the castShadows property for these light sources. Baked light sources always cast shadows and enabling this property would put a significant strain on your GPU resources for no reason.
You can also use other light types (e.g. spot-lights) for baking, but point lights are usually the easiest way to evenly light a large scene.
Once you're satisfied with the result, make sure to check the baked property of all of the light sources you've placed. You'll notice they disappear from the viewport, which is intentional.
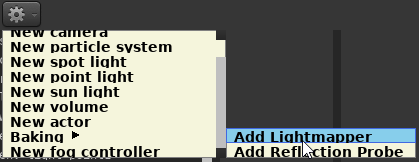
Lightmapper
Once you've got it all set up, you will also have to place a Lightmapper actor in your scene:
Lightmap Area Bounds
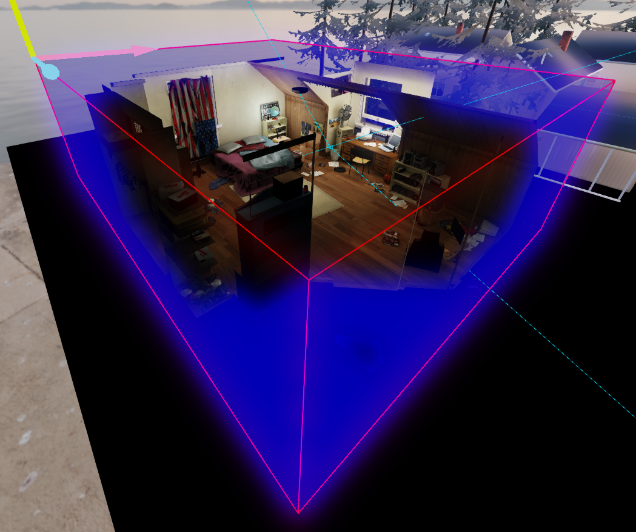
The lightmap area bounds (shown in blue in the screenshot above) define the 3D space for which the lightmaps should be build. Anything outside of these bounds will not be included. This is important because the smaller the area, the higher quality the lightmaps will be, which means the area should fit around the visible scene as tightly as possible.
If your scene is a scenebuild where all actors are visible, then you can skip this step. By default the area bounds will encompass the entirety of the scene.
On the other hand, if your scene is part of a larger map (like in the screenshot above), and only a small portion is actually visible through the camera, then this step becomes more important.
To define the bounds, select the pfm_cuboid_bounds component of the Lightmapper actor. Make sure the showDebugBounds property is checked to enable the blue cube visualization of the bounds. Since the bounds are initially 0 0 0, you will not see anything right away.
Next, select the minBounds property and select the Move-Tool ( ) tool in the viewport window. Move the arrows in the widget to one corner of the scene:
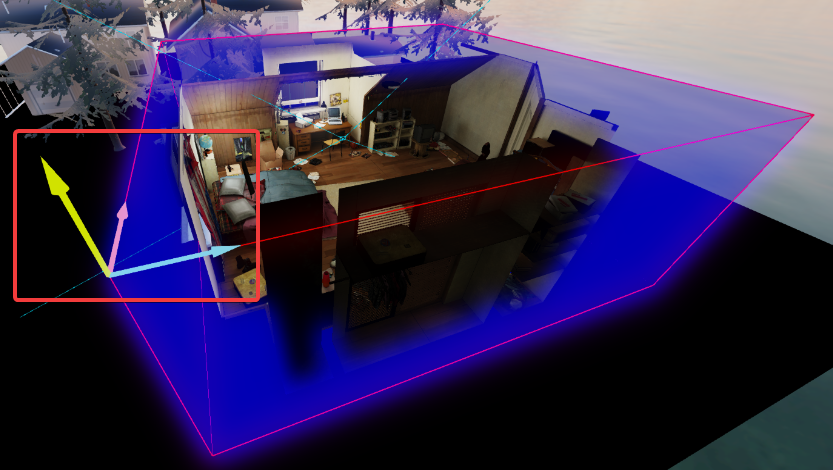
Then do the same with maxBounds and move the arrows to the opposite corner of the scene. You should see a cube forming around it.
Once the scene is encompassed, you can uncheck the showDebugBounds property.
Baking
The final step is to actually initiate the baking process. To do so, select the pfm_baked_lighting component of the Lightmapper actor and click the Bake lightmaps button. Please note that this can take a significant amount of time (i.e. several hours, depending on the scene complexity and your GPU). Do not deselect the component in the actor editor during this process, or the render will be cancelled.
Once the baking is complete, a window such as this will appear:
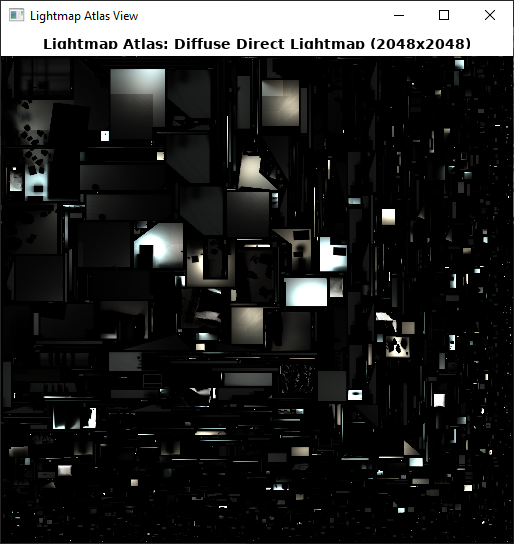
This means the baking was successful. Make sure to save the project, or the lightmap data will be lost. If you move around the viewport, you should see the updated lighting right away. If you're not satisfied with the lightmap quality (e.g. very blurry shadows), you can increase the resolution property of the pfm_baked_lighting component. The resolution always has to be a power of two (e.g. 1024x1024, 2048x2048, 4096x4096, etc.), and higher resolutions will increase render times significantly, as well as require much more VRAM.
If you make any changes to the scene in the future, such as moving, deleting or adding new static actors, you will have to bake the lighting again. For this reason, this step should be reserved for when you're about to do the final render of the scene.
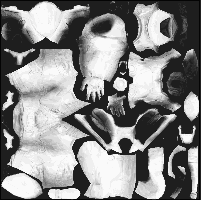
Ambient Occlusion

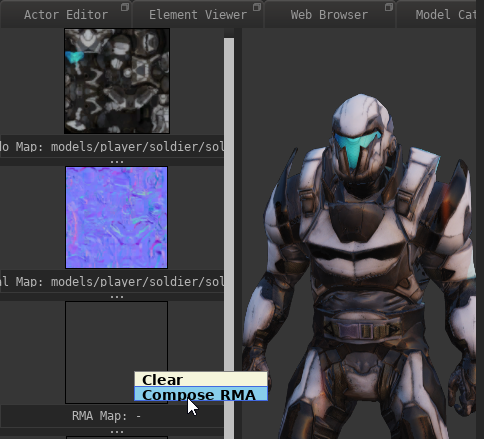
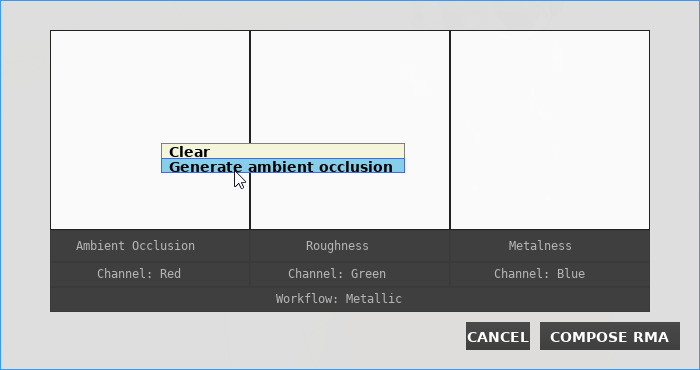
COMPOSE RMA
Shadowed Light Sources
By default all light sources you place in PFM do not cast shadows so save on rendering resources. To enable shadow casting for a light source, simply select the light component of the light source actor in the actor editor and check the castShadows property. If the shadows don't become visible right away, try moving the light source slightly.
Shadowed Light Sources are very expensive in terms of GPU resources, so use them sparingly. This applies to point and directional light sources especially, try to avoid using them if possible and stick to shadowed spot-lights, otherwise you may run out of available VRAM very quickly.
Recommended Effects
Motion Blur
If your animation is set up for 30 FPS or less, enabling Motion Blur is highly recommended. At higher resolutions it may not be as effective, but should still be considered, as the setup is very simple. Check out this article for more information on how to enable Motion Blur.