Rendering
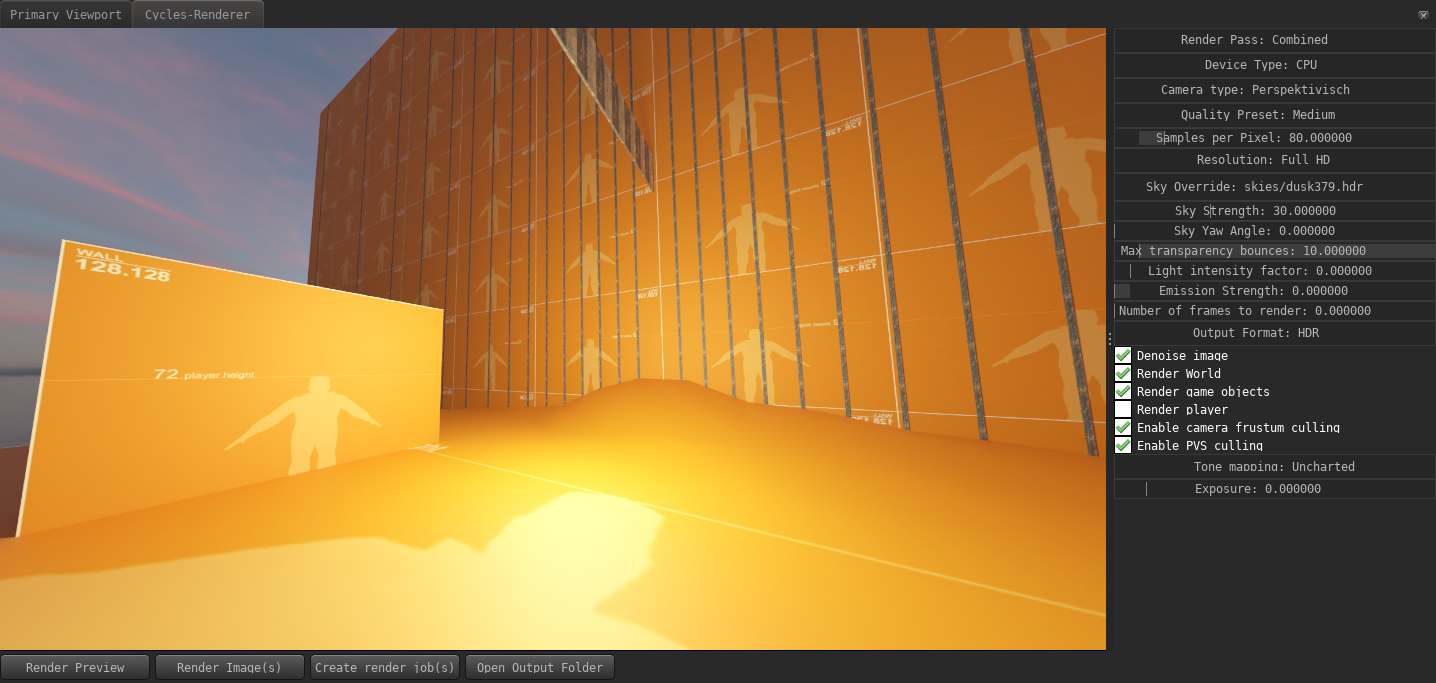
To render your scene, switch to the "Render" tab above the viewport and you should see a window similar to this one (but with a black viewport):
Here you can choose between three renderers:
- Cycles: The same renderer as used by Blender to create highly realistic images.
- LuxCoreRender: Another path-tracing renderer (like Cycles)
- Pragma: Pragma's internal renderer. Requires a bit of setup for good looking results.
Which renderer you should choose depends on your goal and hardware setup. If you're planning on creating a poster or single-frame images, Cycles or LuxCoreRender would be the best choice to get the highest possible quality.
For animations, Pragma is the recommended renderer. You can use Cycles or LuxCoreRender for animations, however you can expect many hours or render time, even for short animations and with modern hardware.
If you want to get a quick preview render, click the "Render Preview" button. This will render an image with a very low sample count and low resolution, which will give you a rough idea of what the final render will look like. To render your final image(s), press the "Render Image(s)" button.
When rendering an image for a new project or a new map for the first time, Pragma may appear frozen for a few minutes, this is because some additional asset conversions are required for the Cycles/LuxCoreRender renderers, and some shaders may have to be recompiled. Subsequent renders should not take as long.
The render options to the right can be used to change the resolution of your render, sample count, number of frames, etc. You can leave most of these options on their defaults in most cases, but here are some of the more important options:
- Render Engine: Which render engine to use. You can choose between "Cycles X", "LuxCoreRender" and "Pragma".
- Device Type: You can render with either your CPU or your GPU. This option only affects rendering speed, the end-result is the same. If you have a modern GPU, you may want to consider switching to GPU rendering.
- Samples per Pixel: The higher the sample count, the higher quality your render will be, at the cost of rendering time. If you notice weird discolorations in your final render, or if you're using advanced render features (like subsurface scattering), you'll likely have to increase this value to get good results.
- Resolution: The resolution of the render. You can choose between the presets, or hold the alt-key and click into the field to enter manual values (e.g. "1000x1200"). Higher resolutions will result in longer rendering times.
- Max transparency bounces: This field is usually not important unless you have a lot of overlapping transparent objects in your scene. If you notice black spots around transparent objects, try increasing this value.
- Light intensity factor: Controls the global light intensity of the scene (excluding lighting caused by the sky).
- Number of frames to render: If you intend to render an image sequence, set this value to the number of frames you wish to render.
- Output Format: The image format that the frames will be saved as once rendering is complete. If set to HDR, no tone-mapping will be applied and the image will be saved with the original 16-bit colors.
- Enable camera frustum culling: If enabled, objects that are outside of the visible area of the camera are not included in the render. This can improve rendering times, but may also cause incorrect lighting in some scenes (especially indoor scenes).
- Tone mapping: The tone-mapping algorithm to use to transform the HDR colors to sRGB space. Some tone-mappers have additional parameters to tweak the result.
Once rendering is complete, the image will automatically get saved to your harddrive. You can press the "Open Output Folder" to navigate to it in the system explorer.
When rendering a large sequence of images or images with a large sample count / high resolution with Cycles X or LuxCoreRender, it is recommended to use the external render tool instead. Please see that section for details.


No Comments