
Virtual Reality
PFM allows you to easily render image sequences for VR videos:
(Click and drag your left mouse button in the video to look around the scene.)
Since Pragma can only render image sequences, you will still need a VR-capable video editing software (like Adobe Premiere 2019) to create the final video. There is also free software available online to do this, but this tutorial only describes the approach for Adobe Premiere.
Setup
To render images for VR, go to the render tab in PFM and change the preset to "VR": 
If you render an image now, it will render a stereoscopic 360° equirectangular image, which can be used for VR videos:
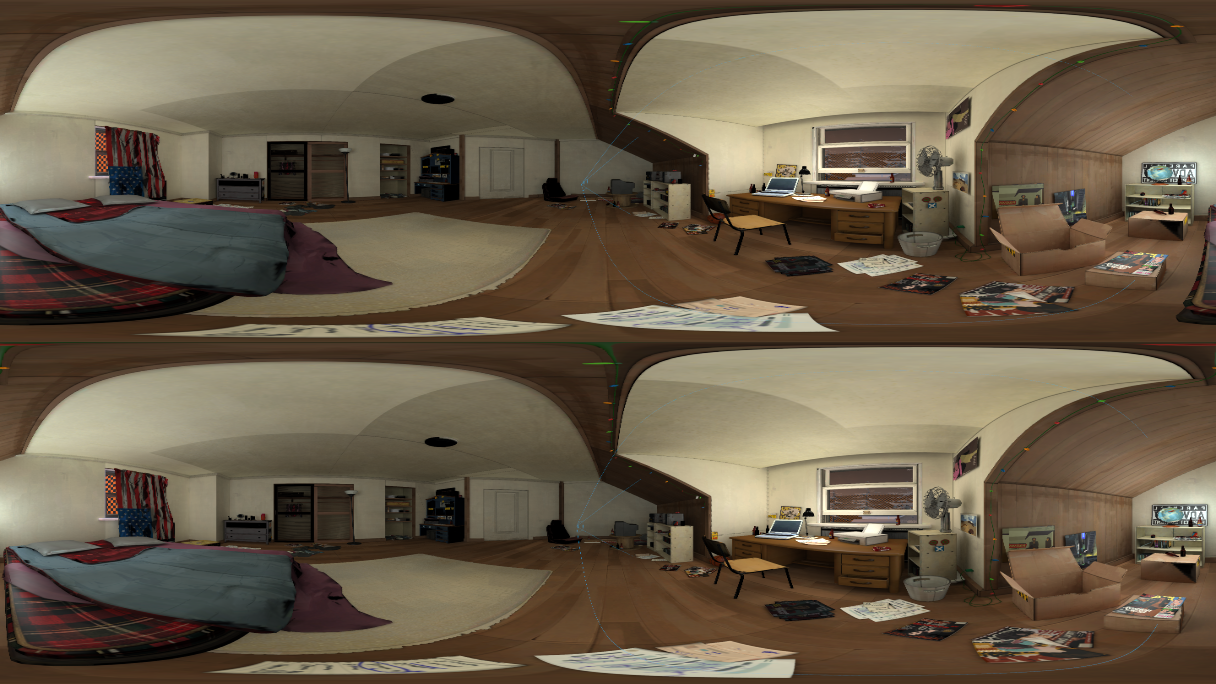
The scene has to be rendered from two perspectives – once for the left eye and once for the right eye, which is why it appears twice in the rendered image. You can change the mode to monoscopic to get a single image from the camera perspective, however this will make depth perception in the final video impossible and is therefore only recommended for non-VR videos.
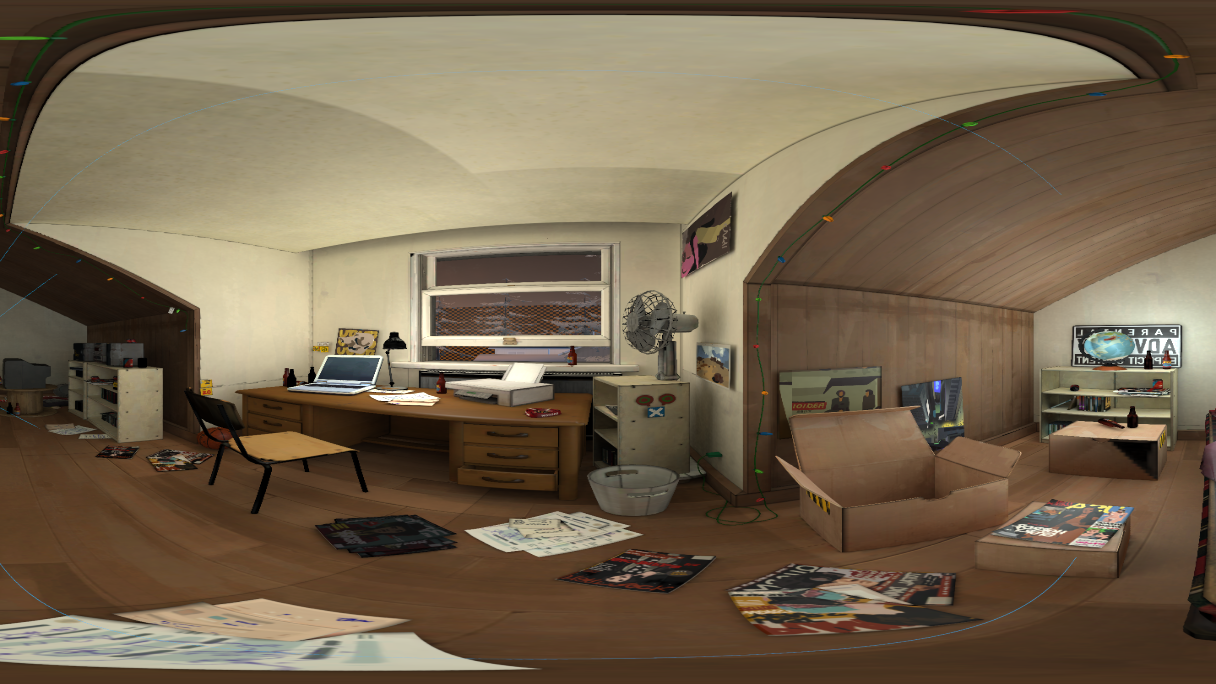
In some cases you may also want to restrict the scene to 180°: 
This effectively doubles the available vertical resolution (therefore improving the overall quality), but only half of the scene will be visible in the video:
Rendering VR / 360° videos requires significantly more time and rendering resources compared to regular images. For this reason it is highly recommended to use the Pragma renderer for these types of videos.
You can use Cycles X or LuxCoreRender as well, but this requires top-of-the-line, modern hardware to get even reasonable render times.
Once the image has been rendered, you can change the viewport mode to inspect it: 
If the image is stereoscopic, you can toggle between a preview for the left eye and the right eye. You can click (and hold) into the image with the left mouse button and move the mouse around to look around the rendered scene for each eye.
The third mode is "flat", which displays the actual image as is.
Camera Orientation
When rendering images of this type, make sure that both the pitch and roll angle of your camera are 0 (or more specifically, make sure the orientation is horizontal to the ground), otherwise the perspective in the rendered image will look very unnatural.
Adobe Premiere
Once you've rendered the image sequence for your VR video, import the images into a new Adobe Premiere project like you would for regular videos. Then, go to Sequence > Sequence Settings in the menu. At the bottom of the dialog box, you should find the following options:

Make sure Projection is set to Equirectangular and Layout to Stereoscopic - Over/Under. Vertical should always be set to 180°, Horizontal Captured View should be set to 180° or 360°, depending on your render settings in Pragma.
If you've set it up correctly, you should be able to right-click the image in the viewport and choose VR Video > Enable. You should now be able to look around the scene by clicking and dragging with your left mouse button.
If you render the video now, it should automatically create a VR video with the correct settings.
No comments to display
No comments to display