
Viewport
The viewport window provides a real-time preview of your scene which you can interact with to select actors, move them around, etc.
Movement
To move the work camera around in the viewport, click (and hold) the right mouse button and drag the cursor around. As long as you are holding down the mouse button, you can move around with WASD. To move slower or faster, you can hold the alt- or shift-key respectively. Additionally, you can use the scroll wheel to change the field of view of the camera while in this mode.
Viewport Modes
Select 

Keyboard shortcut: Q
While in Select mode, you can simply left-click an actor to select them, which is indicated by a blue outline around the object. The actor will also be selected in the actor editor. You can also click-and-drag the mouse cursor to create a rectangle selection and select multiple objects at once.
You can select multiple actors by holding the ctrl-key. To deselect an actor, hold the alt-key. If you right-click a selected actor, you get a number of actions you can perform:
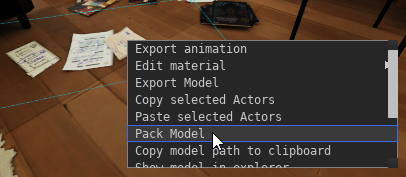
- Edit Material: Opens the specified material in the material editor for quick changes.
- Copy/Paste selected Actors: Copies the actor(s) to the clipboard. You can paste the actor to create a copy, or send the clipboard contents to someone else as plain-text, which allows them to insert the actors into their own projects, including the animation.
- Pack Model: Packs the model of the actor with its materials and textures into a zip-archive.
- Move work camera to actor: Moves the work camera to the actor's position.
- Move actor to work camera: Moves the actor to the work camera's position.
- Show model in explorer: Opens the file explorer for your operating system pointing to where the model asset file of the actor is located.
- Toggle camera link: See Camera-Actor Placement
- Retarget: Use this to retarget an actor to a different model.
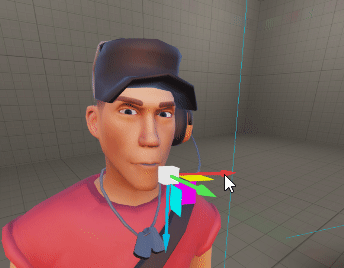
Move 


Keyboard shortcut: T
You can use the move-tool to move a selected actor. By clicking the move-tool multiple times, you can toggle between world-space, object-space and camera-space. Additionally you can also press the x, y or z keyboard shortcuts to move the actor on a specific axis only. Press the shortcut a second time to stop the movement. If multiple objects are selected, they will all be moved together.
You can also enable "snap-to-grid" by changing the "Snap to Grid Spacing" on the right-hand side of the viewport window.
If the actor itself is selected, the move-gizmo will move the actor. If, however, a vector-based property of the actor is selected instead (such as the viewTarget property), the gizmo will affect that property instead:
Smart Move
Instead of using the gizmo in the 3D viewport to move the actor, you can also click and drag the actor itself to move it around. This allows you to quickly move an object to other surfaces, while keeping the distance to the ground the same.
Rotate 

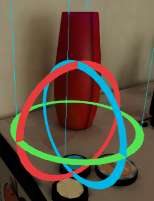
Keyboard shortcut: R
The rotate-tool works the same as the move-tool but for rotating objects. To enable "snap-to-grid" for rotations, change the "Angular Spacing" option on the right-hand side of the viewport window.
Scale 

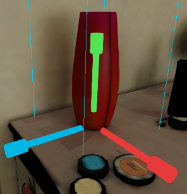
Keyboard shortcut: S
The scale-tool allows you to scale an object on a particular axis. Multi-object scaling (i.e. if multiple objects are selected) is currently not supported.
Camera-Actor Placement
You can also use the camera to move an actor. To do so, right-click the actor in the viewport or the actor editor, and choose Toggle camera link. This will attach the actor to the camera until you click the left mouse-button.
This is particularly useful for spot-light sources, as changing the field-of-view of the camera using the scroll wheel will also change the cone angle of the light source.
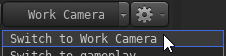
Camera Controls
You can click the camera button near the bottom right to toggle between the work camera and the scene camera.
Secondary Viewport(s)
You can open additional viewports in the menu bar using Windows > Secondary Viewport and Windows > Tertiary Viewport. Please note than some functionality (like selecting actors) is currently only supported for the primary viewport.
Live Raytracing
The viewport also supports a "Live Raytracing" mode, which provides an almost real-time preview of your scene using raytracing. Click here for more information.
Keybinds
| Action | Default Key |
| Increase FOV | scrlup |
| Decrease FOV | scrldn |
| Select Mode | Q |
| Move Mode / Toggle Transform Space | T |
| Rotation Mode / Toggle Transform Space | R |
| Scale Mode | S |
| Delete | Del |
| Move object toward/away from camera (only while transforming) | scrlup/scrldn |
No comments to display
No comments to display